The Boy Who Bakes

Edd Kimber
  • Home
  • Recipes
  • My Books
  • Blog
  • Recipe Index
  • About
  • Home
  • Recipes
  • My Books
  • Blog
  • Recipe Index
  • About

Recipes

  • All
  • baking
  • Biscuits and Cookies
  • Breads and Quickbreads
  • Bundts
  • Cakes
  • Chocolate
  • Dessert
  • drinks
  • Holidays
  • Pastry
  • Scones and Quickbreads
chocoalte caramel tart.jpg

Peanut Butter and Pretzel Caramel Tart

Edd Kimber August 6, 2019

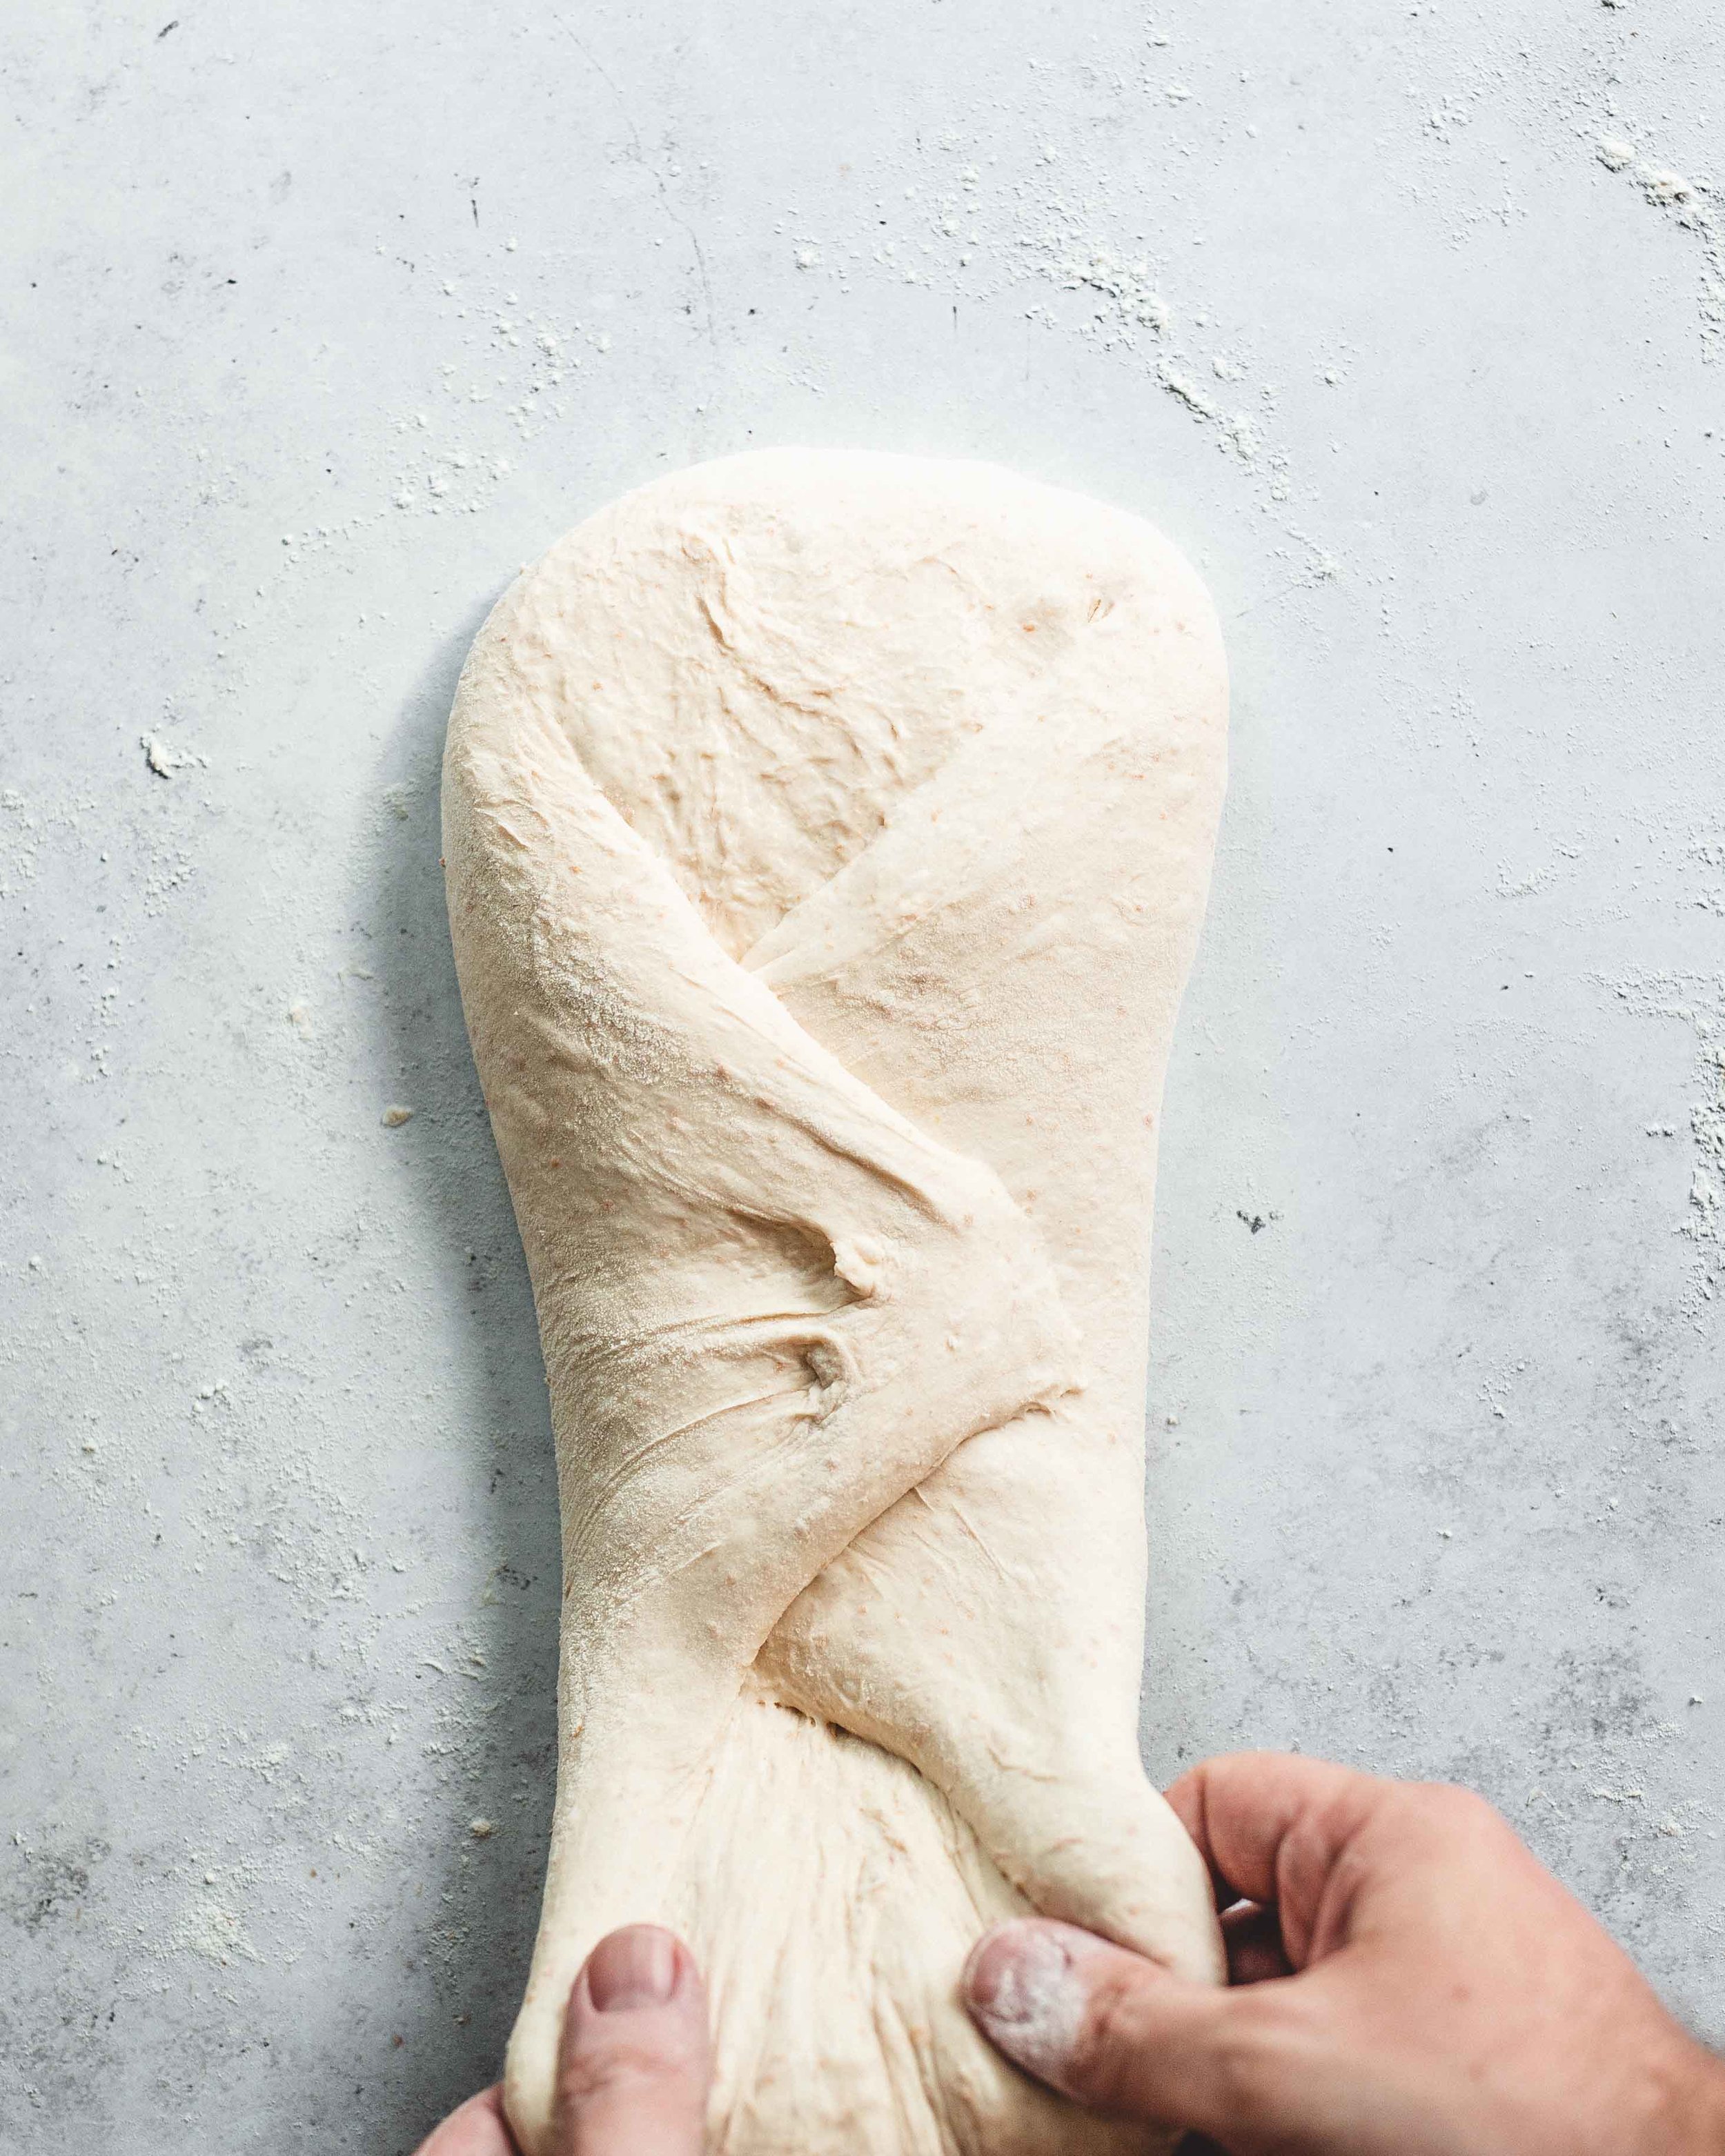
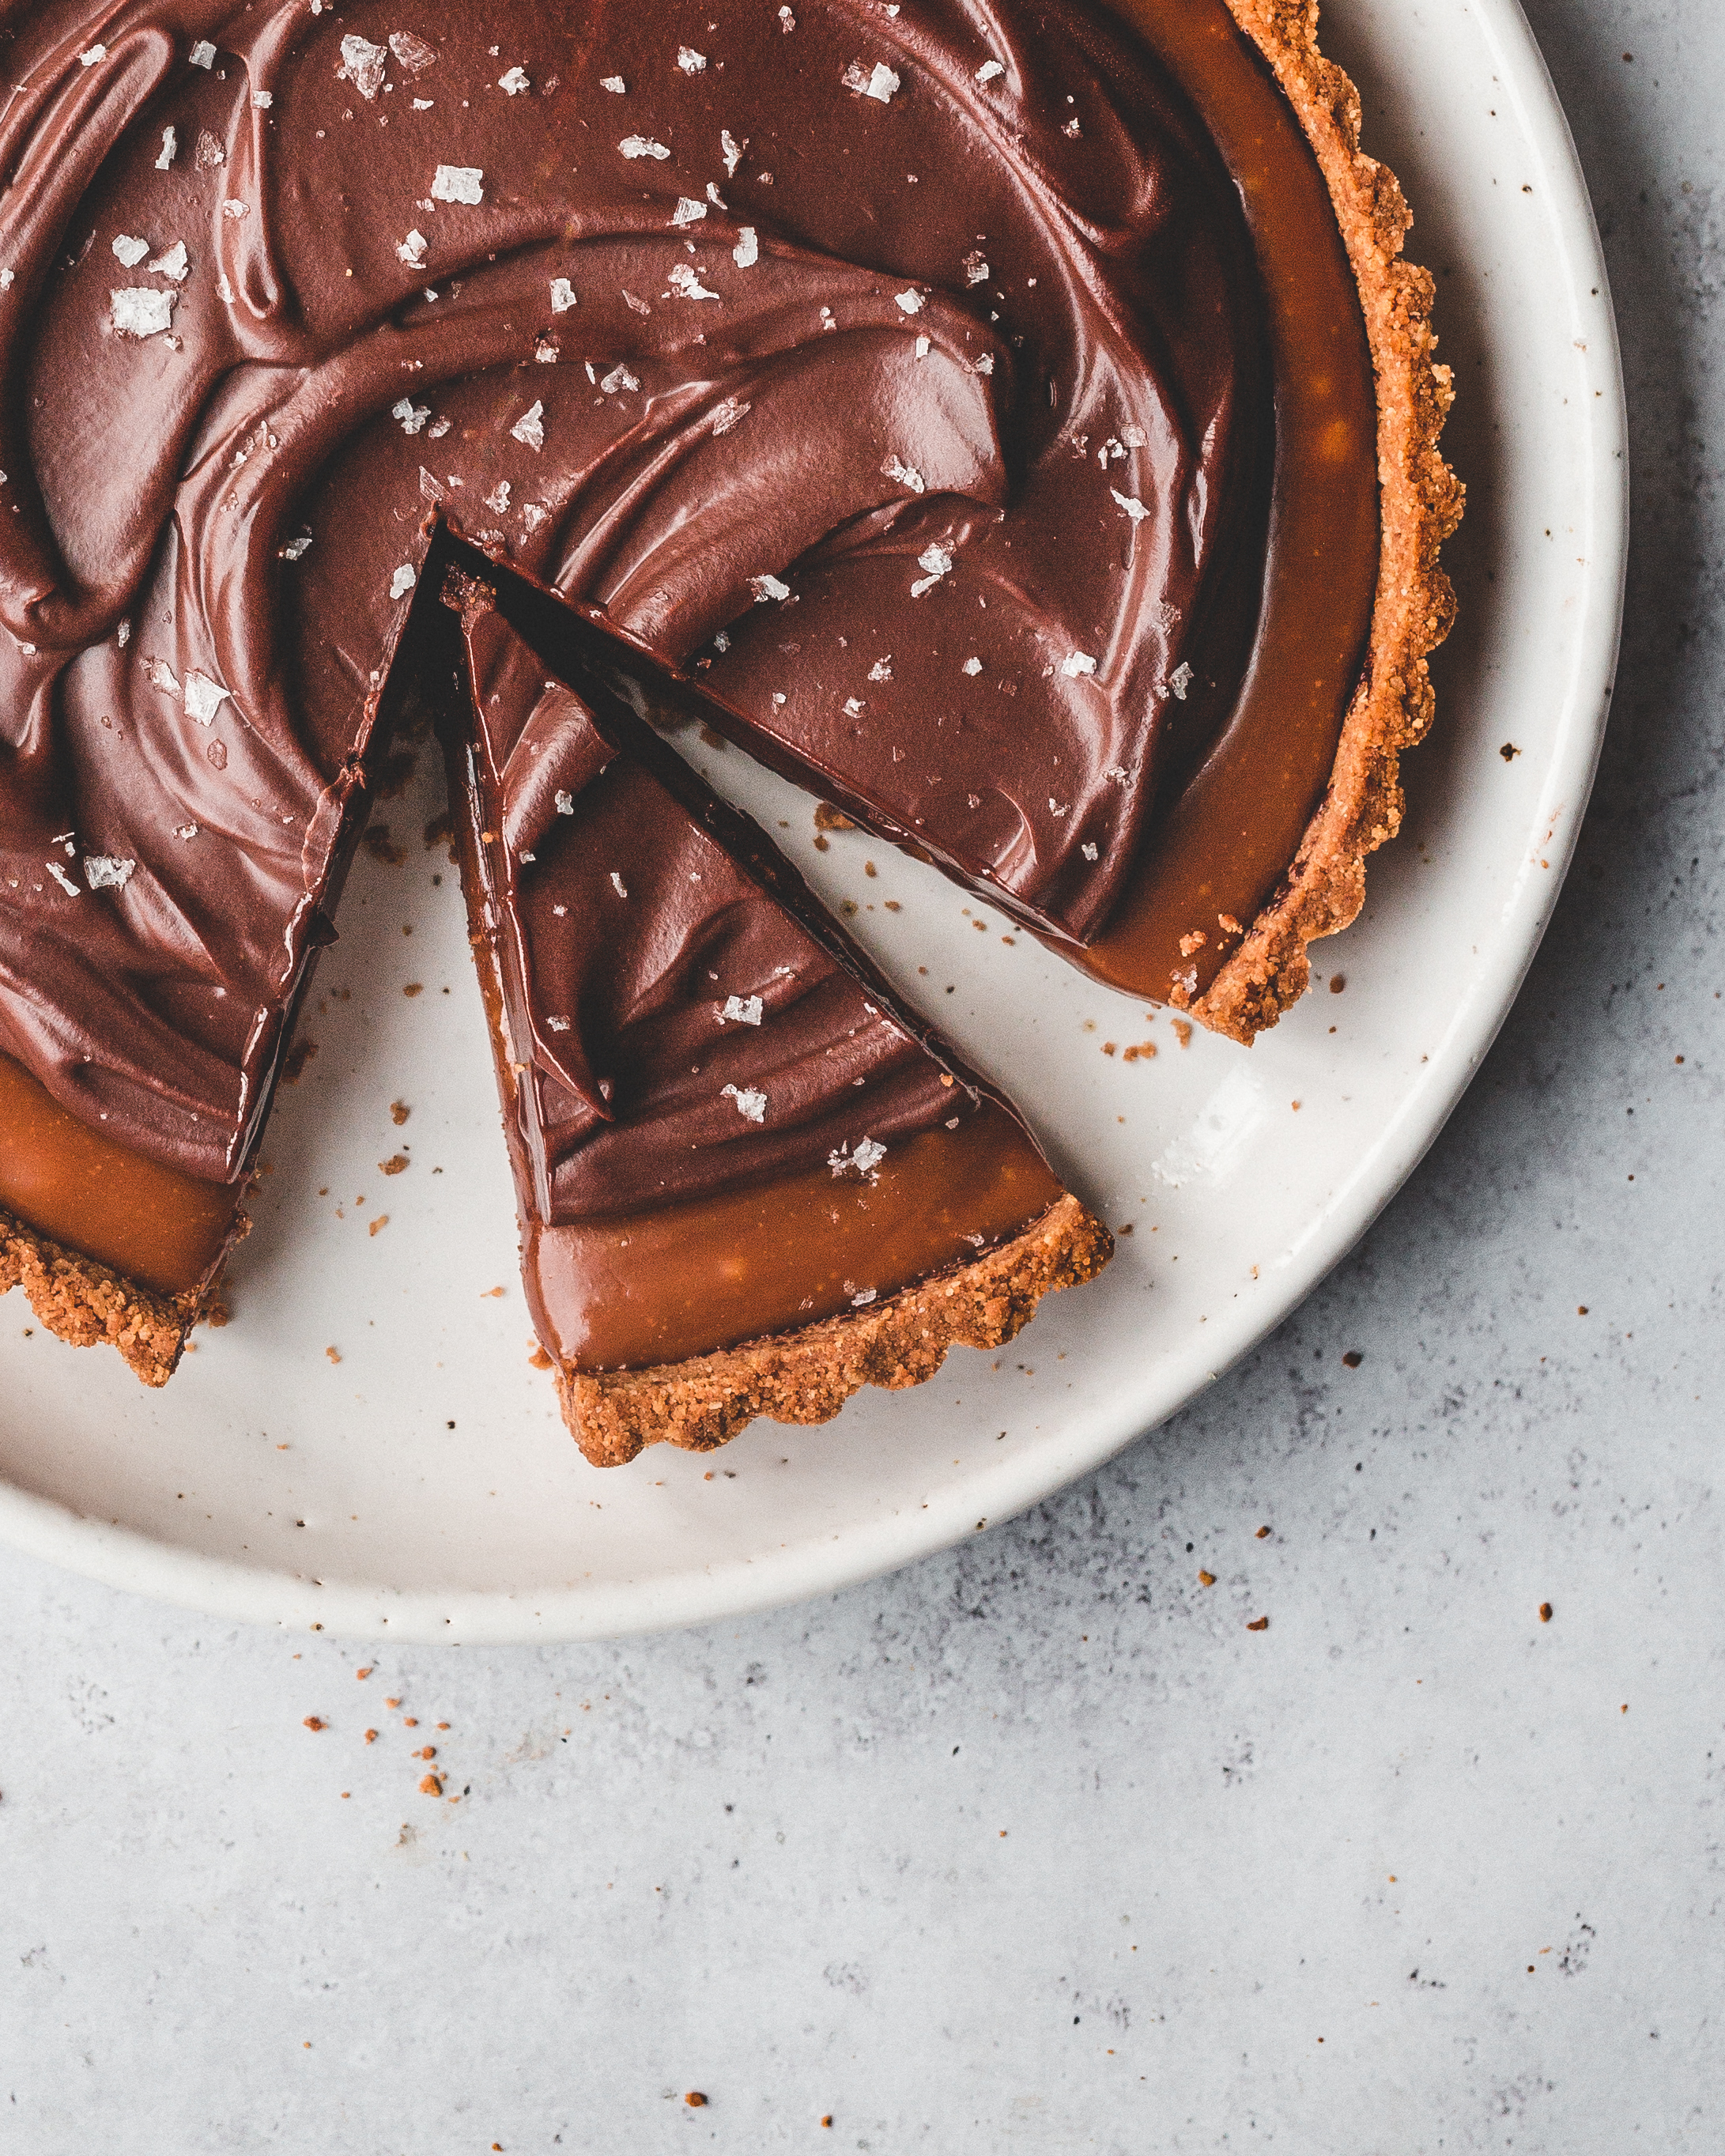
I am currently working away on a project that I am super excited about but it is taking up a lot of my time so I am currently going through my archive to find recipes to share with you guys, to tie you over until the project is finished. Whilst looking for recipes I remembered this tart that I never got around to sharing. It was initially included in a pitch for a big piece of work I wanted to do around chocolate that ended up never getting a green light and sadly I forgot about it. Sadly because seeing the pictures reminded me just how wonderful this dish is. So enjoy it, finally!

Sweet and salty isn’t unusual these days, it’s to be expected. We all now generally understand that just like savoury food sweet things need seasoning and with ingredients like chocolate and caramel sometimes a little salt can help to enhance and highlight flavour whilst balancing the sweetness. This simple tart takes this idea and dials it up to eleven. The crust uses a simple biscuit style base, think the type of base you’d make for a cheesecake. The difference though is egg white. I love the texture of biscuit bases but find them a little tricky when you want nice neat slices, they’re just two crumbly. The addition of an egg white helps to bind the mixture together and makes it a lot easier to work with. Peanut butter and chocolate are a classic combo and anyone who’s ever opened a pack of peanut butter cups will know, a dangerously addictive one at that. The ganache used in this tart is made with a mixture of dark and milk chocolates, milk for the creamy sweetness that goes wonderfully with peanut butter but dark chocolate from preventing the tart from being too sweet.

chocoalte caramel tart-3.jpg


Serves 12

Peanut Pretzel Biscuit Base
50g salted peanuts
100g salted pretzels
75g digestive biscuits (or graham crackers)
100g unsalted butter, melted
1 tbsp light brown sugar
1 large egg white

Peanut Butter Caramel
225g caster sugar
180ml double cream
20g unsalted butter
1/2 tsp salt
2 heaped tbsp smooth peanut butter

Ganache Topping
140g dark chocolate, 65%-75% cocoa solids, finely chopped
140g milk chocolate, 40%-50% cocoa solids, finely chopped
20g unsalted butter
150ml double cream

For the biscuit base finely crush the peanuts, pretzels and digestives into a fine crumb then mix together with the butter, brown sugar and the egg white. Press into a loose bottomed 9 inch round tart tin, using your hands or a flat bottomed glass to compact into the base and up the sides of the pan. Bake in an oven preheated to 180C (160C fan) for about 10-12 minutes just until the biscuit base is set and starting to brown slightly. Remove from the oven and set aside to cool.

To make the caramel filling place the sugar into a medium sized saucepan and cook over medium heat until the sugar has melted and caramelised, turning the colour of an old rusty penny. Carefully pour in the cream, stirring gently until the caramel is smooth then add the butter and salt and mix until combined. Remove from the heat and allow to cool down for 10 minutes before stirring in the peanut butter. Pour the caramel into the cooled tart, spreading into an even layer. Refrigerate for an hour or so until the caramel is firm.

Meanwhile place the chocolates for the ganache into a heatproof bowl, set over a pan of simmering water and heat, stirring occasionally, until the chocolate is fully melted. Place the butter and cream into a small saucepan and bring to a simmer. Remove the pan from the heat and pour the cream over the chocolate and set aside for a couple minutes before stirring to form the ganache. Set the bowl aside until the ganache has thickened into the consistency of whipped cream. Dollop the ganache onto the tart and spread out, almost to the edges. Set aside at room temperature for a couple hours to allow the ganache to fully set. When ready to serve sprinkle the ganache with a little flaked sea salt.

Best served on the day made but can be refrigerated for up to 4 days just allow to come to room temperature before serving.

chocoalte caramel tart-2.jpg
In Pastry, Chocolate Tags peanut butter, caramel, pretzel, press in crust, salted caramel, chocolate, ganache, tart
6 Comments
Jerusalem Bagels-3.jpg

Jerusalem Bagels

Edd Kimber July 25, 2019

In the last few months it feels like I have been on the road more than I have been at home and as much as I love exploring new places and spending time in different kitchens around the world, there is a joy about coming home and being back in a routine, cooking in my own kitchen and sleeping in my own bed. However, after a couple weeks back in London, I find that the recipes and ideas that are stuck in the back of my mind start to sneak their way out and demand to be made; to remind myself of those trips. The most recent example of this was with Jerusalem Bagels, which I first tried at the Jaffa Gate of Jerusalem’s Old City. 

Jerusalem Bagels-7.jpg

Bagels are seen as quintessentially Jewish foods, especially in the US where the bagel was popularised by Eastern European, especially Polish, immigrants in the 19th Century. The Jerusalem bagel is different because its origin isn’t really Eastern European, like its US cousin, it comes from the Middle East. In fact very similar breads are popular all across the Middle East and go by names such as Simit in Turkey or Ka’ak in Arabic countries. For those of us who really only know Eastern European or US style bagels there are some marked differences. The most obvious difference is the shape, being oblong rather than round. The base of the bagels is a very straightforward yeasted dough which contains milk powder and a little sugar. Unlike their US cousins there is no barley malt syrup included and most importantly they’re never boiled, both of which make them easier to make at home. The final bagels, because of their methods, have different textures. The US bagel has its characteristic chew whilst the Jerusalem bagels have a crisp crust with a lighter fluffy centre.

Uri-2.jpg

For the recipe I turned to a baker I was lucky enough to meet and spend time with on a recent trip to Israel, with Vibe Israel, the baker behind Lehamim Bakery in Tel Aviv, Uri Scheft. Uri and his breads may be familiar to those who have visited New York as he was involved with the opening of Breads Bakery (although he is no longer connected with said bakery). I was lucky enough to spend a few hours with Uri and learn about his breads and learn how to make a couple traditional recipes, like challah. Meeting Uri was an amazing experiences, he clearly is an incredibly talented baker and his bakery in Tel Aviv is a massively impressive undertaking. Underneath the bustling bakery is a cavernous kitchen with seemingly endless bakers toiling away making a huge variety of breads, cakes and of course Uri’s famous babka. If you’re a fan of babka you owe Uri a debt of gratitude because the current trend is arguably a result of the babka he sold at Breads Bakery in New York. If you’re ever in Tel Aviv a visit to Lehamim is an absolute best

Jerusalem Bagels-2.jpg

To talk about how to serve the bagel we need to go back to the Jaffa Gate. Very early in the morning a baker takes his bagels and sets up shop at a stand just outside the gate. He sells the bagels, alongside a couple other breads, and with them he gives you a little paper package of zataar. Before we entered the city we tore chunks from the bread and dipped it in the zataar, a perfect breakfast before we tracked down some coffee (dont get me started on my love for arabic/turkish coffee infused with cardamom). Making the bagels back at home in London I wanted to use them to create a more substantial breakfast and taking some inspiration from Tatte Bakery in Boston I made egg in a hole and I would strongly encourage you to do so too, this is a fabulous brunch dish.

Jerusalem Bagels
Makes 6
Recipe adapted from Breaking Breads by Uri Scheft

Bagels
500g plain flour
300ml water, room temperature
7g active dried yeast
60g dry milk powder
50g caster sugar
15g fine salt
20g extra virgin olive oil

Egg Wash 
1 large egg
1 tbsp water
Pinch fine sea salt
60g sesame seeds
Coarse sea salt, for sprinkling

To make the dough place the flour, dried yeast, milk powder, sugar and salt into a large bowl and mix together to combine. Pour in the water and olive oil and using an electric mixer with the dough hook attached (or kneading by hand) mix to form a rough dough. On low/medium speed knead the dough for about 10 minutes or until smooth and elastic. Note that this dough is fairly low in hydration so it wont be a super silky stretchy dough.

Form the dough into a ball and place into a clean bowl and cover, setting aside until doubled in size, around an hour. At this point instead of rising the dough at room temperature I pop the dough into the fridge overnight to very slowly prove. I do this simply because I cannot resist the idea of fresh bagels for breakfast at the weekend. 

If you’ve chilled your dough overnight take it out of the fridge and allow it to come to room temperature for about 15-20 minutes. Take the risen dough and gently press to deflate. Divide the dough into 6 equal sized pieces, forming each one into a ball, then cover with a cloth to prevent them from drying out. Working with one piece of dough at a time roll out into ropes of dough roughly 45-50cm long. Squeeze the two ends together, gently rolling briefly on the counter to ensure the ends are stuck together. I personally find this method easier but you can also just press a finger through the middle of each ball of dough then slowly make the hole larger. If doing this you may need to allow each portion of dough to rest halfway through the shaping as it may resit a little before it gets to the desired size. 

Set the finished bagels onto two parchment lined baking trays then lightly cover and set aside for an hour or so until risen and puffy to the touch (they wont quite double in size but they will increase in volume). Meanwhile preheat the oven to 180ºC/160ºC fan 350ºF

For the egg wash beat together the egg, water and salt until the egg in uniform in colour. Lightly brush each of the bagels with the egg wash and sprinkle liberally with sesame seeds and a little flaked sea salt. Bake in the preheated oven for about 14-15 minutes until golden brown. Remove and allow to cool before serving. 

Jerusalem Bagels are best served within a few hours of baking.

Jerusalem Bagels-4.jpg

To serve them as a full brunch dish, as egg in a hole, place a tbsp butter or oil in a wide pan and place the bagel on top. Over medium heat add two eggs into the hole of the bagel (a little of the whites may spill over but don’t worry too much about that), season with a little salt and pepper then place a lid onto the pan and cook for 2-3 minutes or until the egg white is set. I prefer my egg yolk very runny but you can cook for a little longer if you prefer. Serve with a sprinkling of zataar, some zhoug, cheese or just a sprinkling of fresh parsley. To remind me of Israel I serve these with a very strong cup of arabic cardamom coffee.

In Breads and Quickbreads
3 Comments

Step By Step Sourdough Recipe

Edd Kimber June 21, 2019

You’ve created a sourdough starter, it’s rising and falling with regularity every time you feed it, its time to make our first loaf of sourdough bread. The topic of sourdough could and has filled endless books and you could spend a lifetime learning how to make it and then another lifetime learning to master the subject. In this post I want to keep it as simple as possible to get you started but I will try and pepper the post with as much useful information as possible

White, Wholemeal or Something Else Entirely?

When choosing the flour you have a world of possibilities but to keep things a little easier my recipe sticks mainly to white bread flour, although I sneak a little spelt flour into the recipe for reasons I will explain later. You can definitely make sourdough with wholemeal flour, rye or any other manner of flours but if you’re starting out I find white based bread doughs are a little easier to work with and learn from. If you’re also trying to get a more open crumb I find white doughs are more successful, especially as you’re starting out.

Hydration

I prefer making sourdough with 75% hydration, which means for 500g of flour (bread recipes use ‘bakers percentages’ based on the flour, which is written as 100%) you’d use 375ml water. This results in my favourite bread but higher hydration doughs are also harder to handle so if you’re just starting out maybe try making your first loaf with 70% water so 350ml. It seems like a little change but it makes a difference, trust me. 


Levain
25g mature starter (my starter is 100% hydration)
50g 50/50 flour blend (my blend of white and wholemeal bread flours used for the starter)
50ml water at 27C


The first stage of making sourdough is making a mixture called a levin. If this seems similar to feeding the sourdough thats because its basically the same. The recipe calls for mature starter and this simply means a starter that has recently risen after being fed. If, like me, you generally store your starter in the fridge we need to bring the starter back to live after being dormant in the fridge. To do this, if I want to bake the loaf on a Sunday morning, I take the starter from the fridge on a Friday morning feed it first thing and then again before I go to bed which means come Saturday morning you’ll have a beautiful active starter ready to bake with.


Sourdough Recipe
20% / 100g levain
90% / 450g white bread flour
10% / 50g white spelt flour
75% / 375ml water at 27C
2% / 10g salt


Schedule

9am - Make the levain

The levain needs to double in size to be ready to bake with and unlike with the starter I like to do this in a slightly warm environment. To account for fluctuations in the temperature of my kitchen I like to use my oven with the light switched on. This creates just enough ambient warmth to create a environment perfect for the levain. 

12pm - Autolyse

An hour before the levain is finished rising, when its roughly 3/4 of the way to doubling, we mix together the flour and water (keeping back 25ml for a later use). To do this we don’t need to knead the dough, or develop the gluten, we just want to hydrate the flour. Squeeze the mixture through your fingers, until everything is moistened, scrape any dry bits from the side of the bowl and then cover the bowl and pop it the oven alongside the levain until it finishes doubling. 


The purpose of the autolyse is to fully hydrate the flour, to make a dough that is extensible which is to say nice and stretchy. The process will also lead to a dough that is easier to work with, has better flavour and better rise. Why do we want this? Everyone at home when they're making sourdough seems to want bread that looks like it came from a bakery, with a nice open texture. I have found that more extensible doughs tend to make more open breads and an autolyse is one of the ways you can achieve this. Another thing is using spelt flour. Using a little spelt in the dough really helps the texture and extensibility so I always include a little. Only a little though as doughs with a higher proportion of spelt can be stickier and harder to handle plus the texture of the finished bread isn’t as pleasing, at least to my taste. 

2pm - Bulk Fermentation

Bulk fermentation is the first rise of the bread and it is where the strength, where the gluten, is mainly going to be developed (the autolyse starts this process off). Unlike a traditional bread dough that is kneaded, sourdough, at least this method, is pretty hands off.

Before we mix everything together, test that the autolyse is ready by doing a float test. The recipe for the levain makes a total of 125g and we only need 100g for the dough itself, the rest is for this stage. Take a teaspoon of the the levain and pop it into a bowl of water. If it floats the mixture is full of gas and is ready to bake with, if it doesn’t we need to leave it a little longer. 

Scrape 100g of the levain on top of the autolysed dough and use your fingers to dimple it into the dough. We want to fully distribute the levain so once the dimpling stops working I start folding the dough on itself until it feels more uniform. Leave the dough for 15 minutes before adding the salt. 

salt dimple.jpg

Sprinkle the salt over the dough and use that last 25ml water to pour on top of the dough to help the salt dissolve. Repeat the dimpling and folding process until the salt is distributed. At this stage the dough will separate a little due to the added water but just keep folding the dough until it becomes uniform. As with the levain I like to keep the dough in the oven for the whole bulk to control the temperature.

The bulk should take a total of 4-5 hours depending on the temperature the dough rests at, and how warm the water you used was, and during that period you only have one job and that is to stretch and fold the dough.


Stretch and folds are this recipes kneading and it thankfully takes less time and less effort. To stretch and fold the dough take a wet hand and scoop under the dough lifting it up, gently stretching until you feel some resistance then fold it over itself. You do this at the north, east, south and west points on the dough. This is one set of stretch and folds. We are going to do a total of four sets, spaced 30 minutes apart. Some people do more folds, some less but for me four is generally what I go with and what gives me results I like. If when you turn out the dough from the proving basket it spreads out a lot doing this stage poorly might be one of the issues. The stretch and folds give the dough its strength so this is an important stage. When you stretch the dough up we want to be gentle, stretching until you just feel the dough resisting. If you stretch beyond this point you are tearing the gluten strands and undoing all your good work.

Once you’ve done the stretch and folds we just wait. What we are looking for is a dough that has risen about 20-50% and shows clear signs of fermentation. This would mean a dough that jiggles when you rock the bowl gently and a dough that has bubbles on the top of the dough, especially around the edges. Once thats achieved we are ready for shaping. 

6-7pm - Shaping

Shaping has always been the part of sourdough I have struggled with, it needs to be done with a quick, light hand and lots of confidence. This is not something to question as you do it, you need to be decisive. 

Lightly flour the work surface and use a plastic dough scraper to tease the dough gently from the bowl. At this stage the underside of the dough is floured but the top is still sticky. Using lightly floured hands we are going to do a brief preshape. Go underneath the dough and fold it over itself multiple times as you go around the bowl, forming it into a rough circle. Turn the dough over and cover with a clean kitchen towel and leave to relax for 20 minutes. 

Whilst the dough is relaxing prepare you proving basket or bowl. If you using a traditional cane basket lightly dust with rice flour. Rice flour is your best friend and is wont be absorbed into the dough and helps the dough release easily from the basket. If you don’t have a basket you can use a mixing bowl. Line the bowl with a clean kitchen towel and dust that with flour.

To do the proper shaping lightly dust the top of the dough with flour and turn the dough over, using a metal bench scraper to help release it from the worksurface, turning it onto a non floured part of the work surface.

shape 2.jpg
shape 4.jpg
shape 6.jpg

Think of the dough as a compass. Gently lift and stretch the east point of dough up and over towards the west. Gently lift and stretch the west point of dough up and over towards the east. Gently lift and stretch the north point of dough up and down towards the south. Finally gently lift and stretch the south point of the dough up and over towards the north. Turn the dough over so the seams are on the worksurface.

This rough shape now needs to be tightened up a little. Using both hands, which should remain in contact with the work surface the whole time, cup the dough and drag it towards yourself for a drag of about 15-20cm. The dough should drag along the work surface and you should feel the ball tighten up. Rotate the dough 90 degrees and repeat the dragging, doing this a few times until the dough is taught and round. Be careful at this stage as doing this too many times will tear the dough.

Carefully lift the dough and turn it into a proving basket, the seams should be showing.


7.30pm - Proving

Pop the dough into the fridge and leave overnight

8.30am - Preheat The Oven

We are going to bake the bread in a cast iron pot, something like a large le creuset (I use a pot called a Lodge Cast Iron Combi-Cooker which I love for bread). We want it blisteringly hot so preheat it, as high as it will go, at least 250C, for a full hour.

9.30am - Baking

Take the dough from the fridge and carefully turn it out onto a crumpled piece of parchment. You can either leave the dough as it is or dust with little flour. If you leave it as it is the ridges for the cane basket will be more visible, which is a nice look. 

To control how the dough opens up as it bakes we are going to score it with a sharp blade. I use the traditional lame, a razor blade attached to a handle, but you can happily start with a sharp bread knife. The key to this stage is depth and speed. We want a cut that wont disappear as the dough bakes and we want to work with speed so the cut is nice and clean. To start off I simply do a single cut along the length of the dough. I hold the blade at an angle, almost perpendicular to the work surface which encourages the cut to open up into whats called an ear, a bit of the crust that goes really nice and crisp. Trust me when I say it takes a few goes to get a little more confident with this so don’t worry if its not perfect the first time. If we don’t score the bread it will rip and tear randomly so scoring is advised.

Remove the cast iron pot from the oven and remove the lid. Cut away the remaining parchment and carefully transfer the loaf to the pan and place the lid back on. I advise you to do this wearing oven gloves, even if I don’t wear them, as this pan will be blisteringly hot. Bake in the preheated oven for 25 minutes. Baking the loaf in the pan helps to trap the moisture from the dough, creating steam so the crust is slow to form and the bread can rise to its full potential. Reduce the temperature to 220C and remove the lid and bake for a further 20 minutes or until the crust is nice and dark. If the loaf browns too quickly, in under 10 minutes, you’ll find the crust will soften quicker than desired. If this happens reduce the temperature next time to 200C after removing the lid. 

Even though it is very tempting to cut into the bread immediately leave it at least an hour before enjoying otherwise it will be a little gummy.

In Breads and Quickbreads
121 Comments
Doves Farm Strawberry.jpg

Roasted Strawberry Sheet Cake

Edd Kimber June 19, 2019

Sponsored by Doves Farm Organic Flour

Nothing says summer to me more than strawberries, especially when British strawberries come into season and they are as flavoursome as you remember them in your head. I could eat them for breakfast, lunch and dinner when they’re at their best. When baking with them I don’t really want to mess with them too much, I want to let them shine, but there are a couple things we can do to amp up the flavour and make this strawberry cake something special.

For this recipe I have gone with a sheet cake style, partly because it’s unfussy, partly so the ratio of fruit to cake is higher and partly because I just love a sheet cake. The cake is a very simple affair, a classic cake mixture using Doves Farm Organic Self Raising White Flour (LINKED) and sour cream for the perfect texture, almost like a moist pound cake.  The topping is built around strawberries that have been very lightly roasted in a little sugar and lemon juice to intensify their flavour (this a great recipe if your strawberries are not quite as ripe or flavoursome as you’d hope).  To marry with the strawberries I sprinkled the cake with flaked almonds for a little extra texture, a few small dollops of jam, to amplify the strawberry flavour and a little white chocolate. Now the chocolate, let’s talk about it for a second. Sure, white chocolate and strawberry is a classic combination, but take a closer look at the cake, the chocolate has browned a little. As the cake bakes the white chocolate actually caramelises a little, giving us hints of that caramelised white chocolate we all love.

Once the cake is baked you can serve it a few different ways; on its own, warm with a dollop of vanilla ice cream or maybe with some whipped cream and fresh berries. Whichever way you fancy it, once the cake is baked it needs serving with 2-3 days.

Doves Farm organic flours are available at Sainsburys, Tesco, Ocado and from www.dovesfarm.co.uk 

Doves Farm Strawberry-2.jpg

Roasted Strawberry Sheet Cake
150g unsalted butter, room temperature
300g caster sugar 
1 tsp vanilla bean paste
1/4 tsp salt
3 large eggs
300g Doves Farm Organic Self Raising White Flour
200ml sour cream

Topping
400g strawberries, hulled and halved
2 tbsp caster sugar
2 tbsp lemon juice
1/2 tsp vanilla bean paste
4 tbsp flaked almonds
75g white chocolate, cut into chunks
2 tbsp strawberry jam

Preheat the oven to 180C (160C fan) and lightly grease, and line with parchment, a 9x13 cake pan (the same one you use for brownies). 

Before you make the cake, prepare the strawberries. Toss together with the sugar, lemon juice and vanilla. Pour onto a small rimmed baking tray and roast for about 20 minutes or until the strawberries have softened a little, whilst still holding their shape, and have released some juice. 

In the bowl of an electric mixer, with the beater attachment attached, beat the butter and sugar together for about 5 minutes or until light and fluffy. Don’t underestimate this stage as if you under mix this part the cake will be denser than intended. Add the vanilla and salt and mix for about 30 seconds to combine. Add the eggs, one at a time, beating until fully combined before adding another. Add the flour in three additions, alternating with the four cream, starting and finishing with the flour. Once you have a smooth cake batter pour it into the prepared pan and spread it into an even layer. 

Scatter over the berries, reserving the juice, and repeat with the almonds, white chocolate and jam, placing small dollops across the cake. With all the toppings don’t press them into the batter as they’ll sink a little as the cake bakes, if you press them in before the cake goes in the oven they may sink too far. 

Bake the cake in the preheated oven for about 45 minutes or until golden brown or a skewer inserted into the middle of the cake comes out clean. Allow to cool in the pan for 15 minutes before transferring to a wire rack to cool completely. 

Doves Farm Strawberry-4.jpg
In Cakes
7 Comments
  • Recipes
  • Older
  • Newer

Twitter

  • Was 8 original films, 3 spin off films, a two part play not enough. Can we have something new. https://t.co/cBZdGEGeyv
    Apr 4, 2023, 1:46 PM
  • RT @deliciousmag: Cacio e pepe, but make it buns! These seriously cheesy bread rolls from @TheBoyWhoBakes are inspired by his favouri… https://t.co/oDZlaDgnN2
    Apr 2, 2023, 11:08 AM
  • RT @TheDailyShow: Congrats to Donald Trump on finally winning a majority of votes! https://t.co/ezP55HZgl0
    Mar 31, 2023, 12:43 AM

Instagram

This weeks bonus recipe, for subscribers to my newsletter, is this gorgeous sour cherry and coconut gateau basque. The crust is a buttery cross between pastry and cake, think a cakey cookie. The filling is a layer of sour cherry topped with a rich coconut custard. A real fun one to make too! Link to my newsletter can be found in my bio - #gateaubasque #pastrycream #coconut #sourcherry
In this months @olivemagazine (out today) the team came and photographed my petit kitchen and we talked about how we put our stamp on the place, without spending a fortune. We hated the bland kitchen that we inherited but, as it was relatively new an
In this months @olivemagazine (out today) the team came and photographed my petit kitchen and we talked about how we put our stamp on the place, without spending a fortune. We hated the bland kitchen that we inherited but, as it was relatively new and in good condition, it felt a waste to rip it out and we also didn’t want to spend the money it would take to rip out the whole thing and replace it (it’s a howdens shell so we could have done something cheaper like @plykeakitchens @holte.studio @madebyhusk) so instead I painted all of the cabinets, using @makeitrustoleum kitchen cabinet paint, to give it some personality and lighten the whole thing. Check out the magazine for the full run down. - #kitchendesign #kitchenremodel #rustoleumcabinettransformations #rustoleumkitchencupboardpaint #kitcheninspiration #theboywhobakes #olivemagazine
Are you making scones all wrong? Maybe, maybe not? But I do want to show you how I make them! This recipe is based on the method I learnt at @belmondlemanoir 12 years ago when I did a stage, and it makes the absolute lightest scones. And shock horror, it involves kneading the dough, albeit very lightly. You can get the full recipe in this weeks newsletter (free) linked in my bio. - #scones #bakingday #worldbakingday #afternoontea #hightea #englishscones #clottedcream #creamtea #theboywhobakes
facebook
  • Contact

The Boy Who Bakes

Edd Kimber

facebook